
How to Get a Prototype Made? From 3D CAD Model to Prototype Parts
how to get a prototype made: From 3D CAD Model to prototype parts
Getting a prototype made is an important step between product design and mass production. For engineers, product designers, purchasing teams, and manufacturers, the goal is not simply to turn a 3D file into a physical part. A good prototype should help verify the design, evaluate materials, test assembly, identify manufacturing problems, and reduce risks before production tooling is developed.
The process usually starts with a 3D CAD model and continues through design review, manufacturing process selection, material selection, prototype production, finishing, inspection, and functional testing. Depending on the application, prototype parts can be manufactured using CNC machining, 3D printing, Vacuum Casting, or other rapid prototyping technologies.
1. Start With a 3D CAD Model
The first step in getting a prototype made is preparing accurate 3D CAD data. Common formats include STEP, STP, and IGES. The manufacturer uses this information to evaluate the geometry, dimensions, material requirements, tolerances, and manufacturing feasibility.
A complete technical package should normally include:
3D CAD files
2D engineering drawings
Material requirements
Critical dimensions and tolerances
Surface finish requirements
Color requirements
Required prototype quantity
Assembly or functional requirements
A 3D model defines the overall geometry, while engineering drawings are particularly important when specific dimensions or tolerances are critical to the function of the component.
2. Define What the Prototype Needs to Prove
Before selecting a manufacturing process, determine the purpose of the prototype. Different development stages require different types of prototypes. An appearance model may prioritize surface quality and visual accuracy, while an engineering prototype may require specific mechanical properties and dimensional tolerances.
Typical prototype objectives include:
Appearance validation: checking shape, color, texture, and overall product appearance.
Dimensional validation: verifying critical dimensions and interfaces.
Fit testing: confirming that components fit together correctly.
Assembly testing: checking fasteners, mounting points, clearances, and assembly procedures.
Functional testing: evaluating selected mechanical or operating characteristics.
Customer evaluation: providing physical samples for approval.
Low-volume production: manufacturing a limited quantity before full-scale production.
Defining the purpose at the beginning helps determine the most appropriate manufacturing method and prevents unnecessary processing costs.
3. Choose the Right Prototype Manufacturing Process
There is no single process suitable for every prototype. The choice depends on part geometry, material, quantity, tolerances, surface finish, lead time, and intended application.
CNC Machining
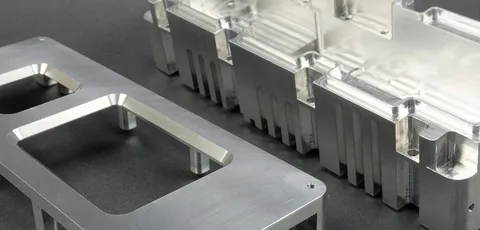
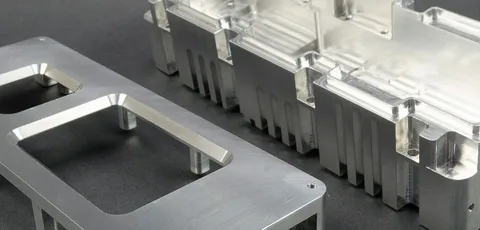
CNC machining is widely used for precision prototype parts when dimensional accuracy, material performance, and surface finish are important. It is suitable for both metal and engineering plastic components.
Aluminum prototype parts
Stainless steel components
Brass and copper parts
Engineering plastic prototypes
Precision mechanical components
Functional prototype parts
CNC machining is particularly useful when the prototype needs to represent the performance or material characteristics of a future production component.
3D Printing
3D printing is often selected for early-stage prototypes because it can produce complex geometries directly from digital data without conventional tooling. It is useful for design verification, fit checks, and rapid design iterations.
Depending on the technology, 3D printing can produce prototypes with different levels of dimensional accuracy, surface quality, strength, and heat resistance. Therefore, the printing method and material should be selected according to the purpose of the prototype.
Vacuum Casting
Vacuum casting is suitable when multiple plastic prototypes or low-volume parts are required. A master pattern is used to create a silicone mold, and polyurethane resin is then cast into the mold to reproduce multiple parts.
Typical applications include plastic housings, consumer electronics components, automotive prototype parts, functional samples, appearance models, and small-batch production.
4. Consider Quantity Before Choosing a Process
The required quantity has a direct influence on prototype manufacturing cost. A single prototype may be economical to produce through CNC machining or 3D printing, while a larger number of similar plastic components may make vacuum casting more attractive.
For example, if an engineering team needs several dozen parts for assembly testing, customer evaluation, or pre-production validation, producing them through a silicone mold may be more practical than investing in a conventional Injection Mold.
When comparing manufacturing options, buyers should consider the relationship between tooling cost, unit cost, quantity, lead time, and required performance rather than evaluating the unit price alone.
5. Select the Appropriate Material
Material selection should be based on what the prototype needs to demonstrate. If the prototype is only being used for visual evaluation, appearance may be the primary consideration. If it will be subjected to functional testing, mechanical and thermal properties become more important.
Common materials for CNC prototype parts include:
Aluminum
Stainless steel
Brass
ABS
PC
POM
PA
PMMA
For vacuum casting, polyurethane resins can be selected to reproduce different levels of hardness, flexibility, strength, and appearance depending on the application.
6. Review the Design for Manufacturability
A professional prototype manufacturer should review the CAD model before production. This design-for-manufacturing review can identify features that may increase machining time, create molding problems, or make the prototype unnecessarily expensive.
Common factors include:
Wall thickness
Deep cavities
Undercuts
Sharp internal corners
Difficult machining features
Complex mold separation
Unnecessarily tight tolerances
Difficult-to-machine materials
Instead of applying extremely tight tolerances to every dimension, engineers should identify the dimensions that are critical to product performance and specify tighter tolerances only where necessary.
7. Manufacture the Prototype Parts
After the process and material are confirmed, production begins. A typical workflow is:
3D CAD Model → DFM Review → Process Selection → Material Selection → Prototype Manufacturing → Surface Finishing → Inspection → Testing
Depending on the selected process, additional operations may include tooling, silicone mold making, heat treatment, CNC secondary machining, painting, plating, or other surface treatments.
8. Apply the Required Surface Finish
Surface finishing can significantly influence the appearance and performance of prototype parts. The appropriate finish depends on whether the prototype is intended for engineering testing, customer presentation, or product evaluation.
Sanding
Polishing
Bead blasting
Anodizing
Powder coating
Painting
Plating
Laser marking
Surface texturing
For a functional prototype, dimensional accuracy and mechanical performance may be more important than cosmetic appearance. For a presentation model, however, color, texture, gloss, and surface quality may be critical.
9. Inspect the Finished Prototype
Inspection is an essential part of prototype manufacturing. Before shipment, critical dimensions and product requirements should be verified against the approved CAD data and engineering drawings.
Depending on the project, inspection may include:
Critical dimensional inspection
Hole position verification
Wall thickness inspection
Flatness measurement
Surface quality inspection
Assembly and fit verification
Material verification
Visual defect inspection
For precision components, appropriate measuring equipment can be used to verify critical dimensions and maintain consistency between prototype batches.
10. Test and Validate the Prototype
The purpose of a prototype is to provide practical information before mass production. Once the prototype is completed, it can be used for engineering validation and product development.
Typical testing includes:
Fit testing
Assembly testing
Functional testing
Ergonomic evaluation
Structural testing
Thermal testing
Customer approval
Design verification
If testing identifies a design problem, the CAD model can be modified and another prototype can be produced. This iterative process allows engineering teams to resolve problems before committing to expensive production tooling.
What Are Examples of Prototype Parts?
Prototype parts are used across many industries. An automotive manufacturer may need prototype dashboard components, center console parts, sensor housings, brackets, or other interior and exterior components for design and assembly validation.
Consumer electronics companies may require prototype housings, covers, buttons, brackets, and internal structural components. Industrial equipment manufacturers may use CNC prototype parts to verify mechanical interfaces, movement, and assembly.
The best manufacturing method depends on whether the prototype is intended to validate appearance, dimensions, assembly, mechanical performance, or the overall product concept.
How to Get a Prototype Made for Automotive Applications
Automotive prototype manufacturing often requires tighter control over dimensions, materials, surface quality, and assembly interfaces. Prototype automotive components may be used for interior design validation, structural testing, fit checks, functional evaluation, or customer approval.
Typical automotive prototype applications include:
Dashboard and instrument panel components
Center console components
Automotive interior trim
Sensor housings
Brackets and mounting components
Lighting-related components
Functional mechanical parts
For automotive projects, the prototype process should be selected according to the final testing requirements. A visually accurate model and a functional engineering component may require completely different materials and manufacturing processes.
What Are Rapid Prototyping Tools Used For?
Modern rapid prototyping tools include CNC machining equipment, 3D printers, vacuum casting equipment, CAD/CAM software, 3D scanners, and precision inspection systems.
These technologies allow manufacturers to move from digital design to physical parts with fewer development cycles. However, equipment alone does not determine prototype quality. Engineering experience, process selection, material knowledge, quality control, and finishing capabilities are equally important.
What Should You Send When Requesting Prototype Parts?
When requesting a quotation from a prototype manufacturer, providing complete technical information can significantly improve quotation accuracy and reduce unnecessary communication.
3D CAD model
2D engineering drawing
Required quantity
Material specification
Critical tolerances
Surface finish
Color requirements
Application information
Assembly requirements
Target delivery date
If you are unsure whether CNC machining, 3D printing, or vacuum casting is the right choice, a qualified manufacturer can review the design and recommend the most suitable process based on quantity, material, geometry, and functional requirements.
Conclusion
Getting a prototype made is a structured engineering process rather than simply manufacturing a physical model from a 3D file. The project normally moves from CAD design and DFM review to process selection, material selection, manufacturing, finishing, inspection, and functional validation.
CNC machining is well suited to precision metal and plastic prototype parts, 3D printing is effective for rapid design iterations and complex geometries, while vacuum casting provides an efficient option for multiple plastic prototypes and low-volume production.
For B2B product development, choosing the right prototype manufacturing process at the beginning can help control development costs, shorten lead times, improve design validation, and reduce production risks before mass manufacturing begins.